


Years ago in a boutique, I saw a full-length mirror with a diamond-like rhinestone encrusted frame. I seriously coveted it, but its seemingly outrageous $375+ price tag prevented my purchasing it. Convinced I could make a similar one myself for less, I kept on the lookout for a suitable framed mirror to embellish. Unfortunately, the cheapest large framed mirrors I saw were over $200, hardly candidates for beating that $375 retail price for my proposed reproduction.
Imagine my elated surprise to stumble across the perfect mirror for my project in an Oregon Home Goods store while vacationing on the coast last November. The mirror was only $29.99! It was 41″ tall, 19″ wide, and 3/4″ thick, perfect for hanging on the door at the end of our home’s long hallway. The 3″ wide flat pebbled white wooden frame around its lovely beveled mirror offered the perfect surface for my proposed embellishments. I snapped it up, tucked it into our car’s back seat, and triumphantly carried it home.
Acquiring Components
The next step was to find clear rhinestone jewelry with silvertone settings to glue onto the frame. It was the wrong season for garage sales, and I was eager to get started, so I spent the next three months scouring eBay for suitable brooches, earrings, bracelets, and necklaces.
Fortunately, a recent fad for making and carrying jewel-encrusted satin bridal bouquets instead of floral ones worked in my favor. The Chinese recognized this potential market and are now offering collections of various rhinestone brooches for reasonable prices on eBay. I snapped up a few of these sets, thinking I would just order more until I had enough to cover my frame. Upon their receipt, however, I realized the Chinese were using bright silvertone metal that sparkled almost as much as the rhinestones in these brooches. Although they were quite pretty, I knew they would not produce enough contrast to create the rich “dripping in jewels” effect I was after. I needed to mix them with vintage jewelry.
This realization led me back to eBay in search of vintage jewelry auctions. Bidding wars ensued as I tried to keep my investment as low as possible while still acquiring the items I needed. Meanwhile, I taped paper over the mirror’s surface to protect it from glue drips. I also bought 1- and 5-row rhinestone cupchain and glued it on the frame’s inner and outer edges, respectively.
Design Layout
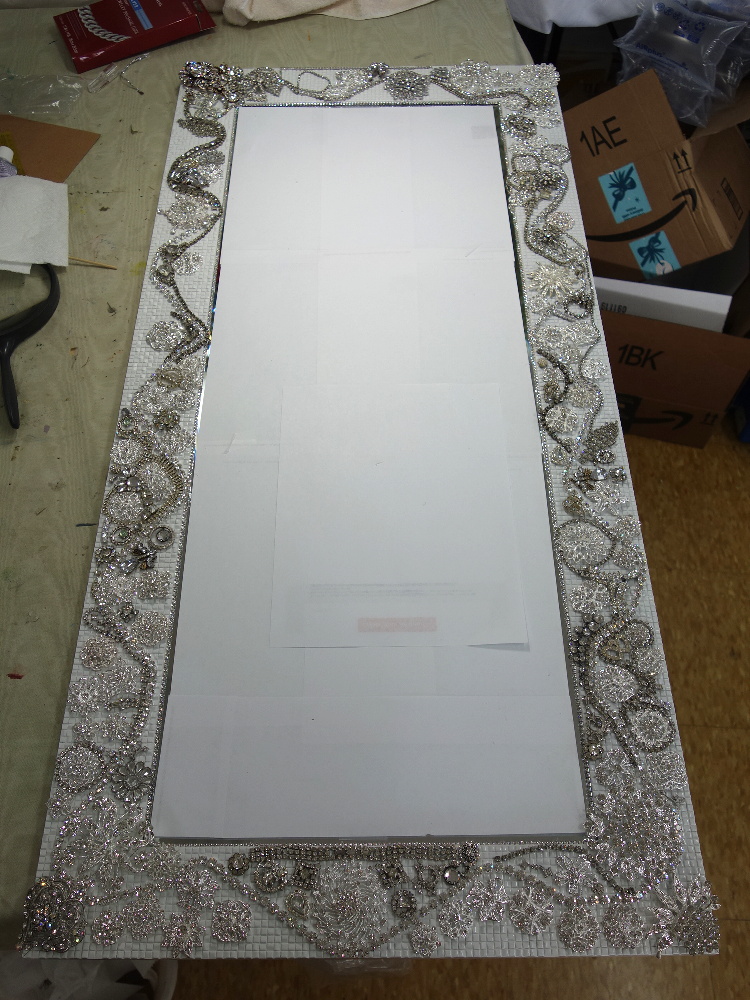
I decided early on that I would not glue anything to the top surface of the frame until I was satisfied with the final arrangement of all the embellishments. My layout began by positioning the loveliest large brooches in the four corners. I connected them by laying large 1-row crystal cupchain in graceful S-curves on the frame’s top surface. As I received jewelry shipments, I enlisted my husband’s help clipping off the pin backs and earring attachments, as that required significant strength. I then used them to fill in the design. The work in progress is shown below.
I continued in this manner, mixing vintage pieces with new ones, until I was satisfied with the design and the quantity of jewels. The picture below shows the final layout before I began gluing things down.
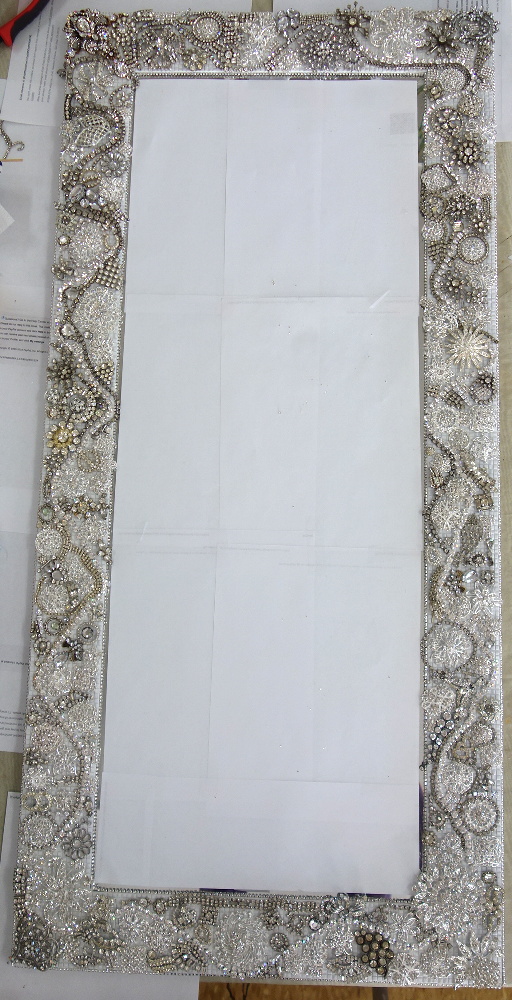
At this point, I decided to change out the darker brooch in the lower left for something else, as its color was standing out too much.
Gluing Process
I used E6000 high-viscosity glue for the entire project. I like that it dries clear, waterproof, and flexible, and it has a 5-8 minute repositioning time. After 24 hours, its bonds sufficiently hardened so I could do additional work on the project.
Although I hoped to replicate the above layout exactly when I began gluing, I quickly realized that would be impossible. I had to force myself to just go with the flow. I deliberately spread the gluing process out over six sessions, as it was very picky work, and I didn’t want to breathe the glue fumes for too long at a time.
My cupchain “snakes” looked lovely in my design, but they proved challenging during the gluing process. Instead of picking up each piece and then gluing it into place, I had to totally and logically remove a 4-6″ section of pieces (and cup chain) at a time. I tried to set them temporarily on the adjacent papered-mirror surface in some semblance of their relationship to each other. Then I used a long bamboo skewer to spread glue over the entire exposed portion of the frame.
Next, I laid the cupchain and/or necklaces/bracelets approximately where I wanted them to be placed. Working quickly, I positioned the remaining pieces around the cupchain, adding glue to pieces as needed to hold them securely in place. I often had to massage the position of the cupchain often to accommodate adjacent pieces’ sizes and positions, so it was important to determine its desired position as soon as possible.
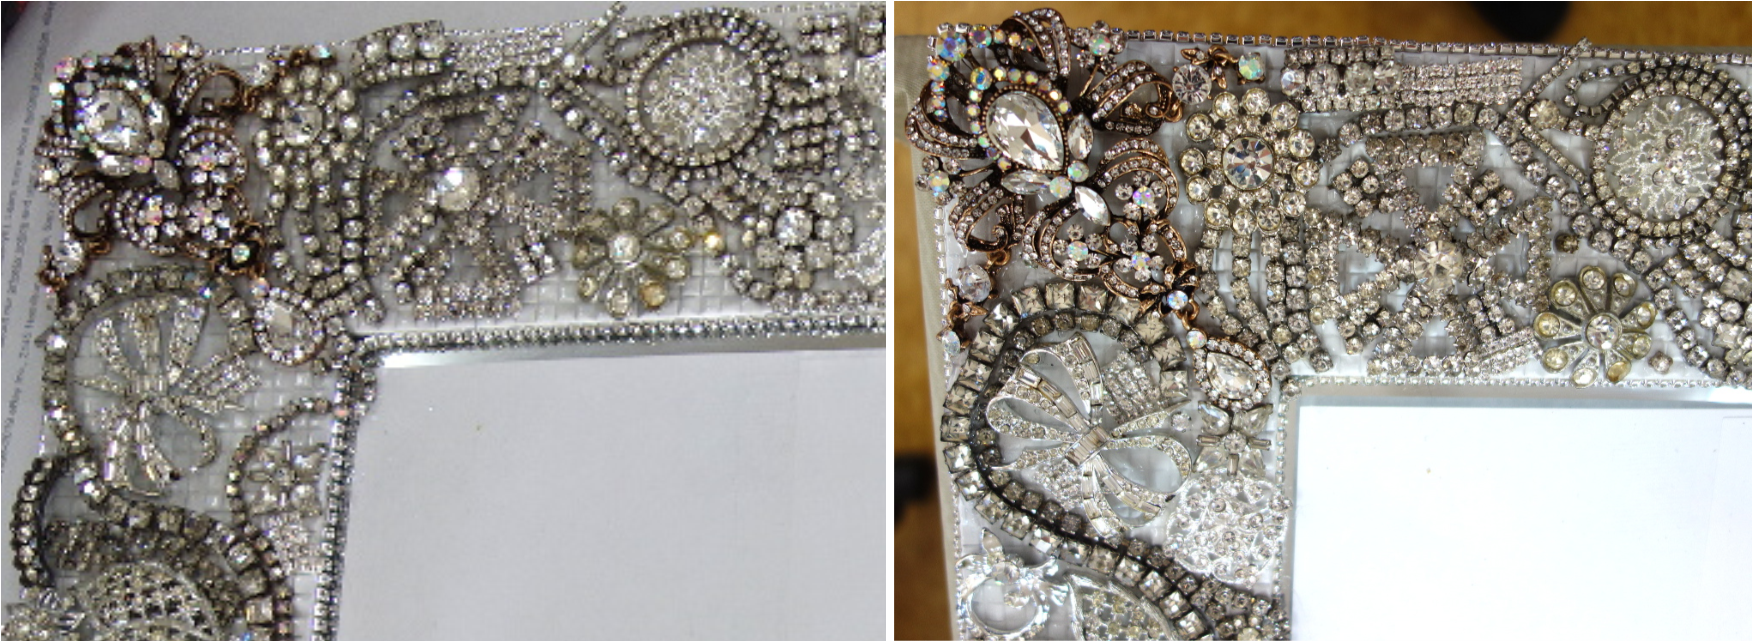
Here are close ups of two of the corner layouts before and after gluing, respectively, so you can see what changed during the gluing process.

I had some 5-row cupchain left over, so I cut it into pieces to fill in some of the empty spaces in the design. After I had completed gluing the items onto the entire frame, I used a collection of single-stone stud earrings (with their posts cut off) to fill in smaller voids in the design. I used a tweezers and generous dabs of glue to set these securely into place.
Installation
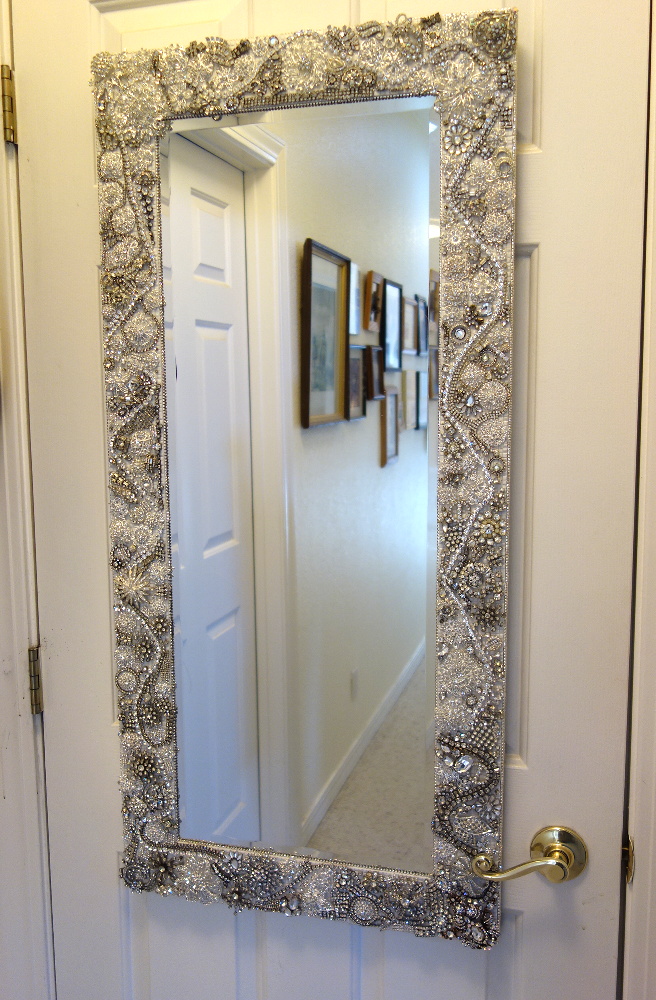
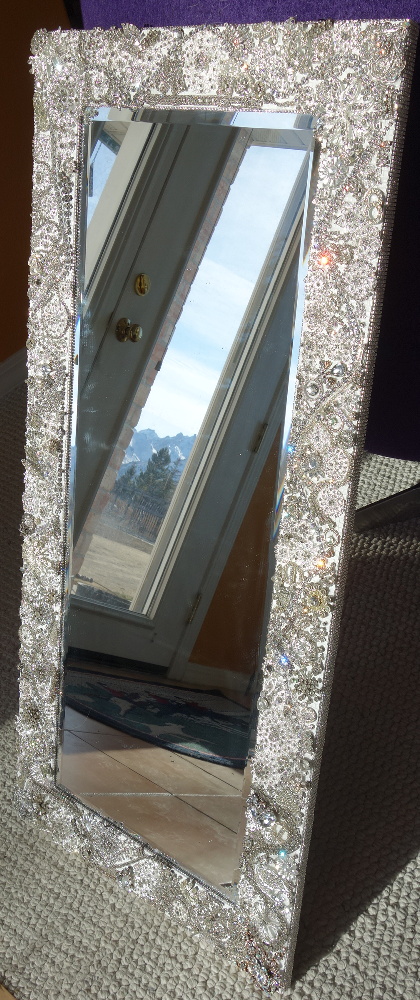
With great satisfaction, I removed the protective paper, cleaned the mirrored surface, and set the the finished mirror in the sun to photograph it in all its sparkling glory.
Instructions on the back of the mirror recommended it be hung on hooks from the metal loops attached to each side of the frame. After significant measuring and subsequent trials and errors, my husband and I hung it securely on the door at the end of our home’s long hallway. We were careful to position its height so one’s full body is visible when standing at the far end of the hall.
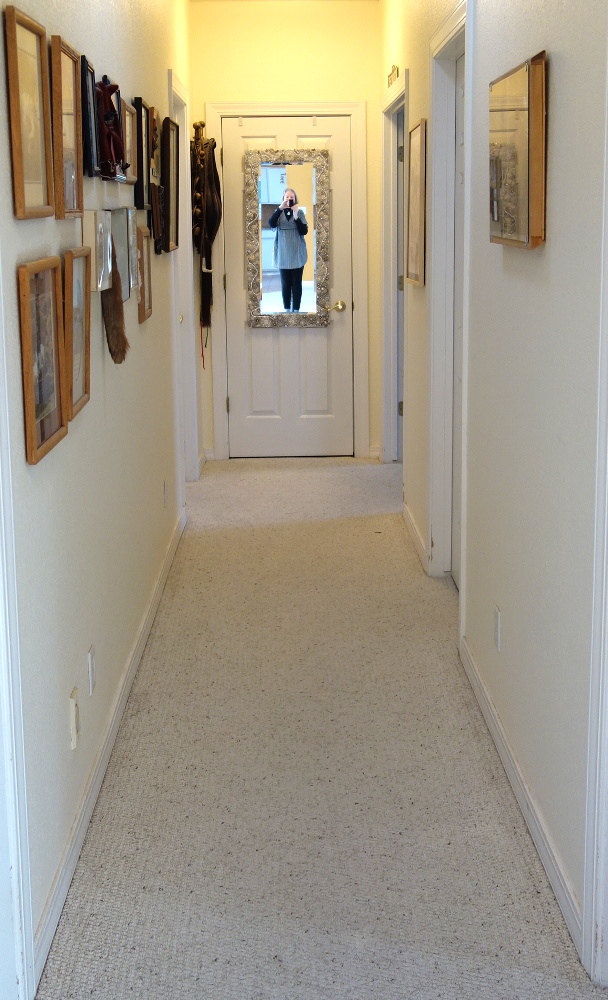
In the daytime, sunlight hits the mirror through the two adjacent bedroom doors and the hallway’s skylight. At all times, the mirror reflects light from the living room at the entrance to the hall, providing a welcoming “light at the end of the tunnel” that was never present before.
Summary
Completion of this project took three months and brought my long-imagined dream to fruition in a most satisfying way. I enjoyed the challenge of finding the mirror and its many components. Working on the layout over time was a pleasing endeavor, especially as I obviously have a great fondness for bling. Although the gluing process was painstaking and challenging, I completed it in short daily sessions over less than a week.
The big question: Was I able to reproduce my inspiration mirror for less than its $375+ price? To complete this project, I spent $30 for the mirror, $10 for the glue, and a whopping $436 for the bling (including shipping). The grand total: $476! I likely could have reduced the cost of the bling by scavenging at thrift shops and garage sales, but that would have required much more time and effort.
Although this project was expensive, I enjoyed the creation process. I and many others will undoubtedly treasure this gorgeous jeweled mirror for many years to come. It is a welcome and exciting addition to our home decor.
I look forward to receiving your comments on this project and my creation process. Have you ever tackled a similar project? If so, please share your story.