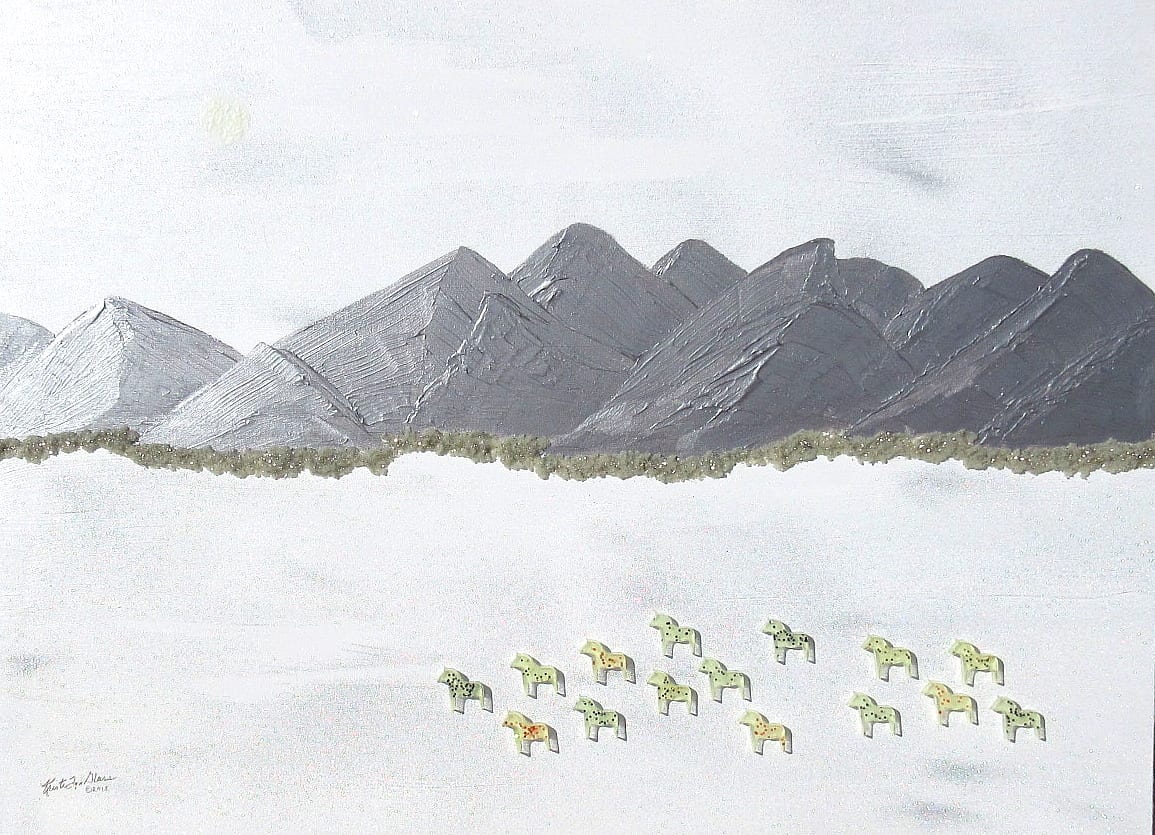
I recently completed a larger version of my previous glow-in-the-dark “Moonlit Ponies” acrylic painting. The new work, “Moonlit Horses,” is shown above. It is 30″ x 40″ on gallery wrap canvas. If you look closely in the upper left side of the sky, you can see the moon, mainly discernible by its bumpy texture.
The larger herd of horses, shown in detail below, is comprised of Appaloosa-like steeds with four different spot types: gold stars, orange iridescent disks, and dark and light silver stars. I chose these inclusions to provide variety and glitter in the sunlight while allowing their white nighttime glow to shine brightly behind their spots.

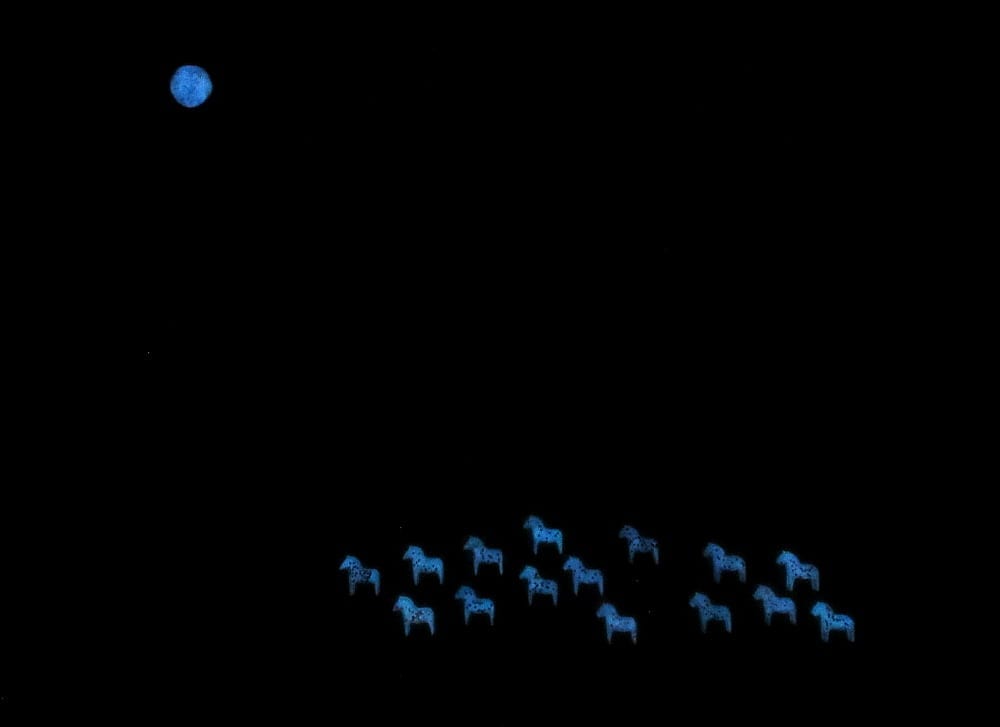
The 3D molded clear resin horses’ glow-in-the dark paint (also used on the moon) emits white light for approximately 6 hours after exposure to sunlight or a UV light source. The white hue of this paint, applied to the back side of each horse before gluing it unto the canvas, is a more logical choice than the blue and green colors I used on the horses in “Moonlit Ponies.”
Due to its 6-hour glow time following UV/daylight exposure, the best location for hanging this work will be where it will get full late afternoon sunlight. Otherwise, installing a UV light source (on a timer) to shine on it before “lights out” will produce the same effect.
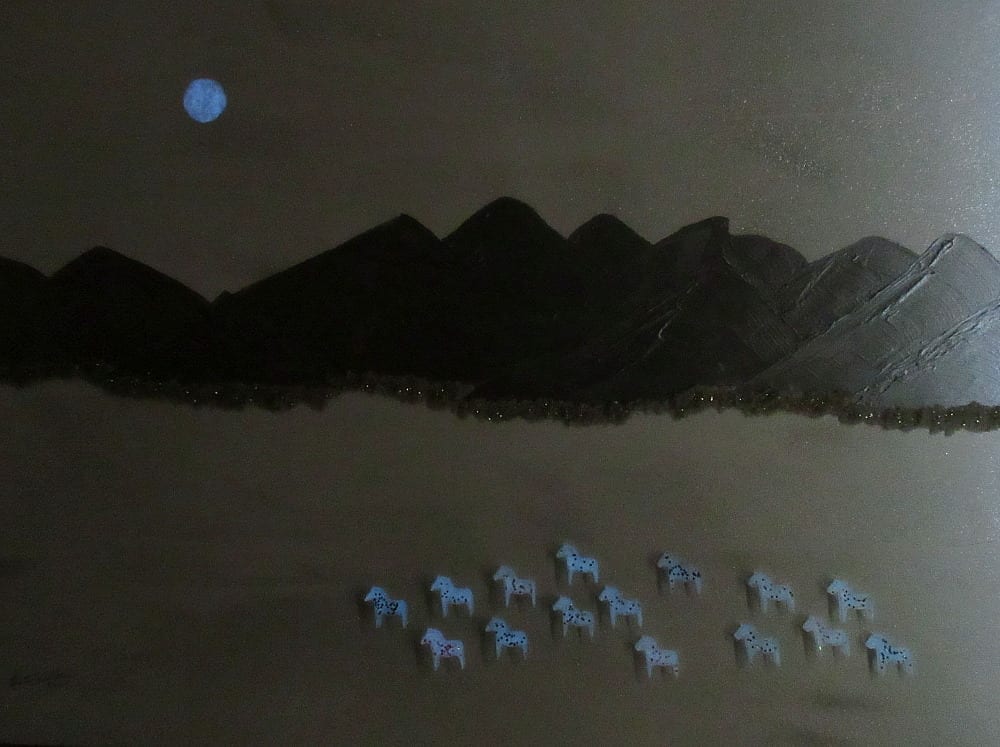
Here is what it looks light in half light (after 10 minute exposure to full sunlight):
And in total darkness:
Other refinements made in this work, based on my earlier experiments, include:
- Using a darker gray iridescent acrylic combined with a heavy bodied clear medium to give more presence and dimension to the mountains and their slopes.
- Adding a heavy bodied clear medium to the white foreground acrylic paint to give it more texture.
- Using a wider brush to apply the white acrylic paint.
- Not spreading the white acrylic color as evenly on the sky, thus allowing the sky’s glitter to have bare swaths that read like clouds.
- Using three coats of the glow paint, instead of two, on the horses and moon.
- Letting the 3D crystal mortar follow the undulating base of the mountains, rather than applying it in a straight line.
- Applying silver glass glitter to the crystal mortar, instead of gold glass glitter.
- Applying the glitter to the sky and foreground by flicking it off of a mop brush, rather than sprinkling it on, to provide more even coverage.
- Spraying the entire work (before painting the moon and adding the horses) with a clear fixative to firmly set the glitter.
I continued to use plain silver glitter on the sky and holographic rainbow silver glitter on the snowy foreground, both in extra-fine grade. These are dazzling in the sunlight, but impossible to capture in a photo.
If I were to change anything more at this point, I would maybe move the horse herd up a tad, closer to the base of the mountains, to add a more realistic perspective. An alternative would be to use a canvas that is more of a strong horizontal than a rectangle with these proportions.
I’m pretty pleased with this work, but I would be willing to part with it (or produce a similar work for you) for a price. If this interests you, inquire!


What an interesting project, Kristi! I love how you have taken your medium in directions I’ve not seen before! Beautiful all times of the day and night!