


This tutorial shows how to turn any rigid flat surface into artwork with a cloisonne-like look using hot glue and paint.
Project Needs
Tools
- Hot glue gun
- Heat gun
- Silicone-covered stylus (or other types of hot-glue-moving sticks or toothpicks)
- Gloves to protect your hands from hot glue burns
Materials
- Solid-surface the size and shape of the desired finished product
- All-purpose hot-glue sticks
- Glossy metallic spray paint
- Acrylic or other suitable paint
- Protective UV-resistant semi-gloss spray coating
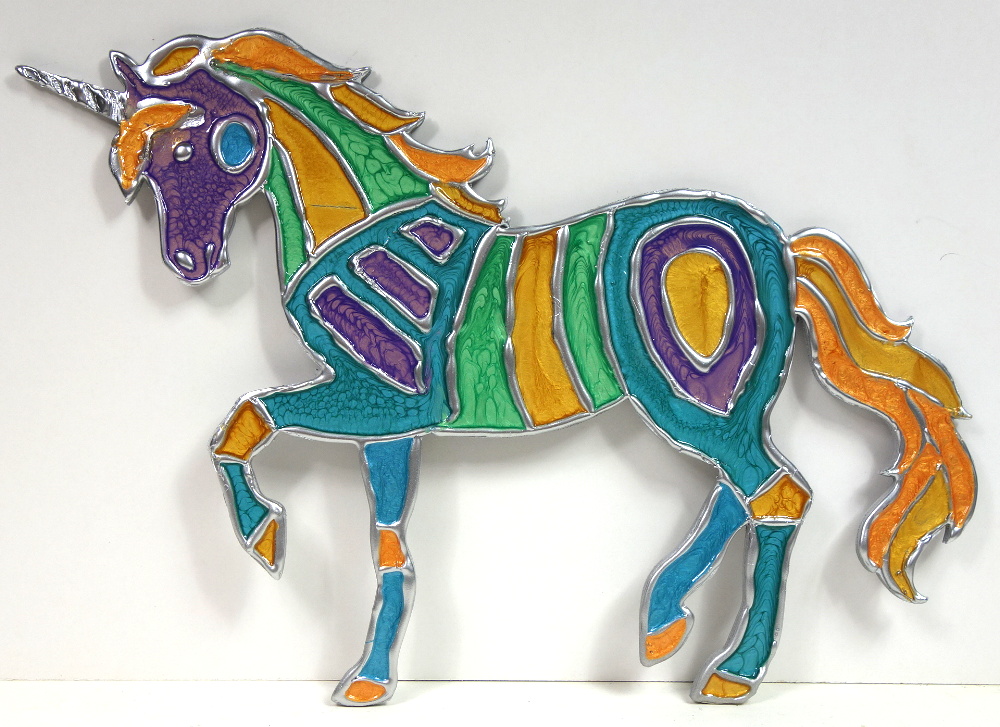
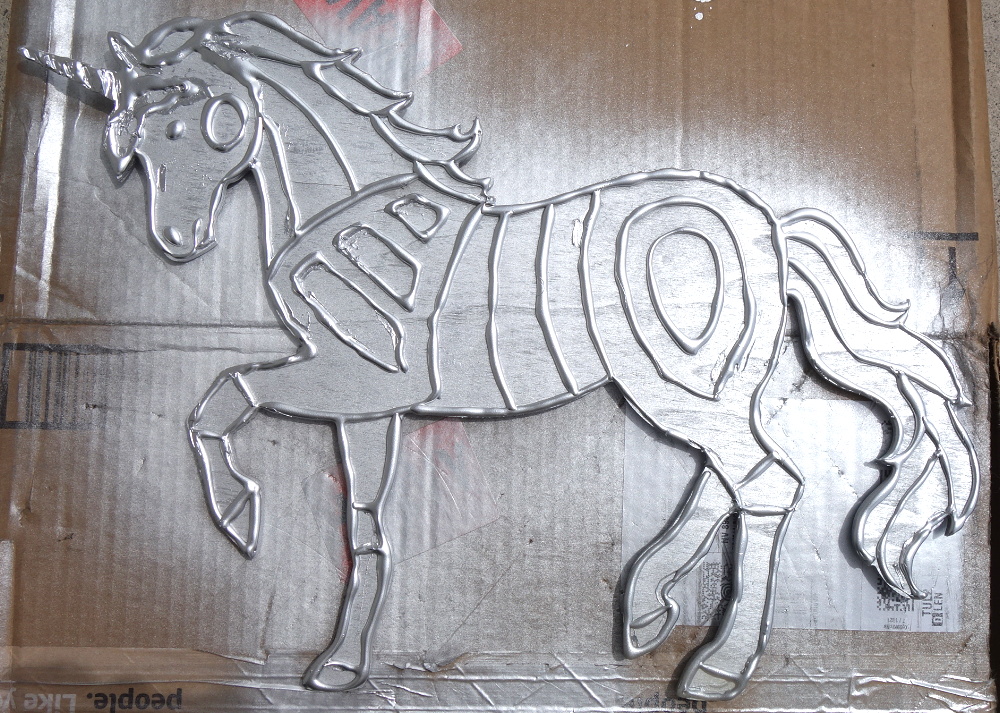
To create the above colorful Cloisonne Unicorn using this technique, I started with a simple 18.5″ wide by 11.75″ tall x .25″ thick wooden unicorn cutout purchased at a craft store. I traced its outline onto a large sheet of paper and used a pencil (and eraser) to work out a design on the paper for the pattern of areas I wanted to enclose with outlines of hot glue.

The design assumed I also would be outlining the top of the entire outside edge with hot glue. It’s important, at this stage, to allow enough space in the design to accommodate the approximately .25″ thickness of the hot glue lines, which will be much wider than the pencil lines.
I then used the paper diagram to draw the lines in pencil onto the wooden cutout. I eyeballed this, but you could use carbon or graphite transfer paper to transfer the design, if desired.
After heating up my glue gun, I donned appropriately protective gloves for working with hot glue. Working from left to right, as I am right handed, I then added a bead of hot glue on top of all the pencil lines and along the top edge of the wooden cutout.

It is important, during the gluing process, to take your time and quickly correct as many mistakes as possible along the way. I stopped gluing at a logical stopping point whenever I noticed a glue line needed correction. I used a silicone-covered stylus to push the molten glue where it needed to be, while it was still moveable. Excess glue or glue drips may easily be removed, while hot, by simply scraping them off the surface. I kept a soft rag handy to quickly wipe the stylus clean of glue before using the stylus again.
Don’t panic if a glue “mistake” hardens before you can correct it. After you have completed covering all your design lines with glue, and it has hardened, you may correct most mistakes by using a heat gun to soften a small area of glue.

Then use your stylus or other glue-moving tool to scrape away, reposition, or reshape the softened glue.
Here is an example of sloppy glue-lines on the unicorn’s head and horn.
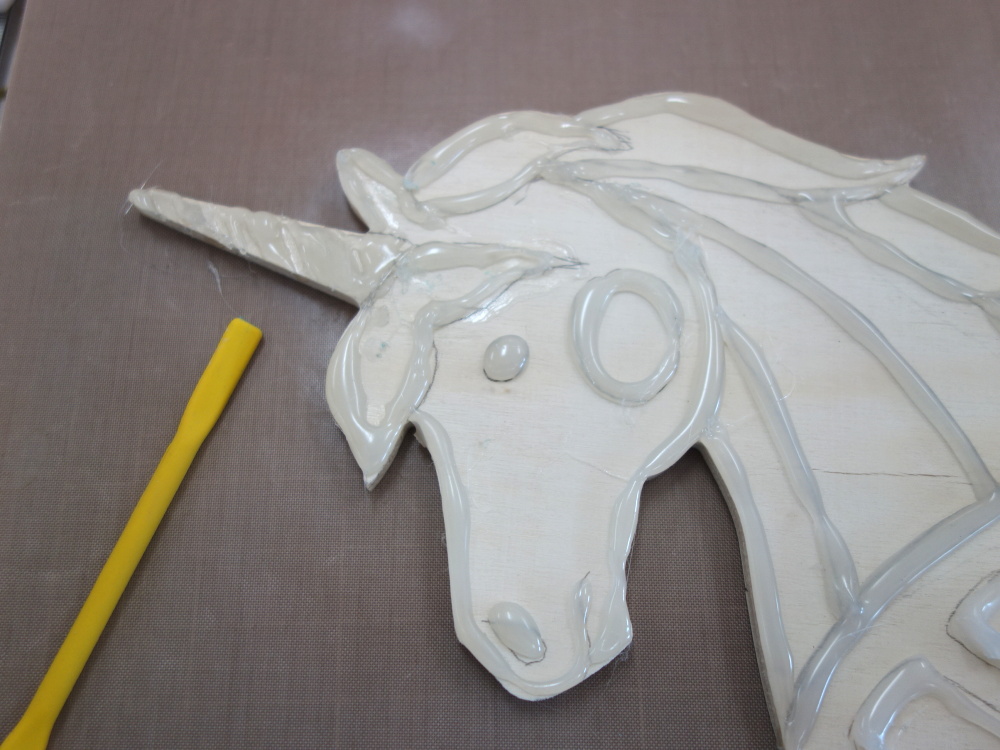
Using the heat gun lightly will neatly melt any glue wisps or peaks, but be careful not to overheat the glue. The picture below shows how reheating the glue too much can cause it to spread. Note the problem this created with the unicorn’s mane.
Using my yellow silicone-covered stylus (shown above), I was able to use my heat gun to soften and reshape the glue.
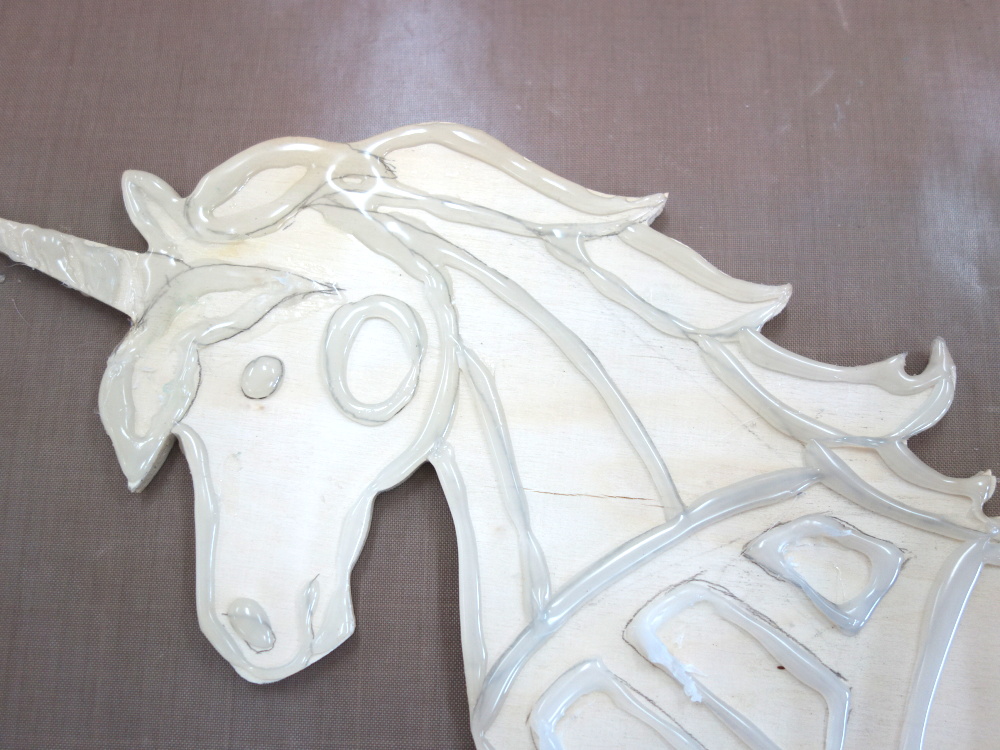
Here is the corrected result. Note how I was able to fix the mess in the mane. I also created more realistic lines in the horn by scraping away excess glue and forming more consistent ridges there.
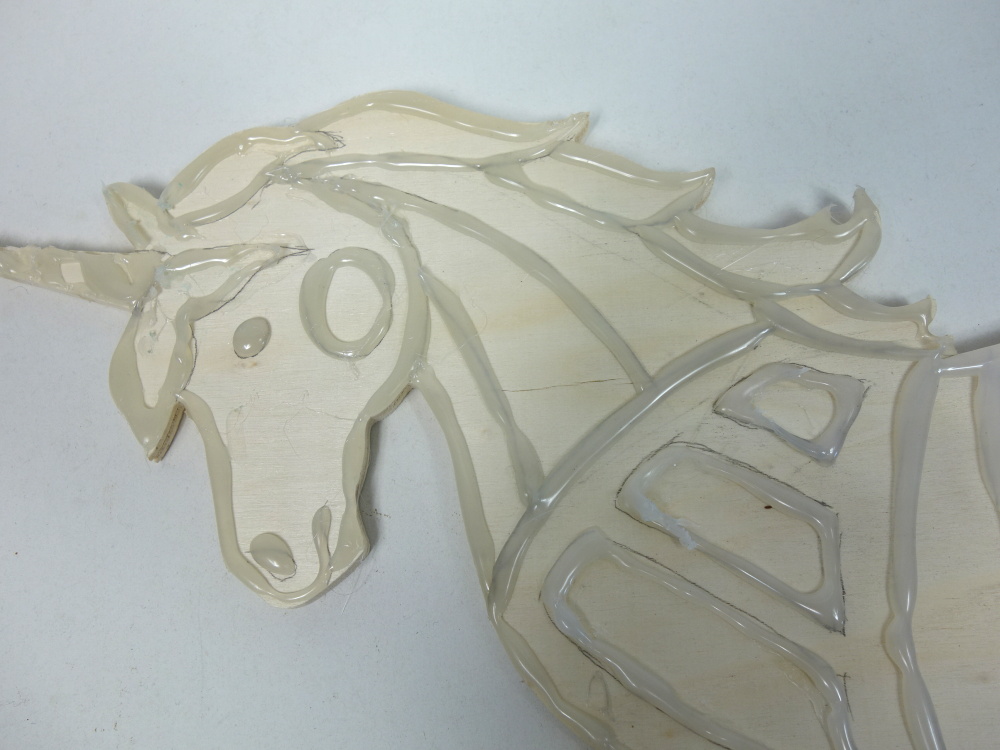
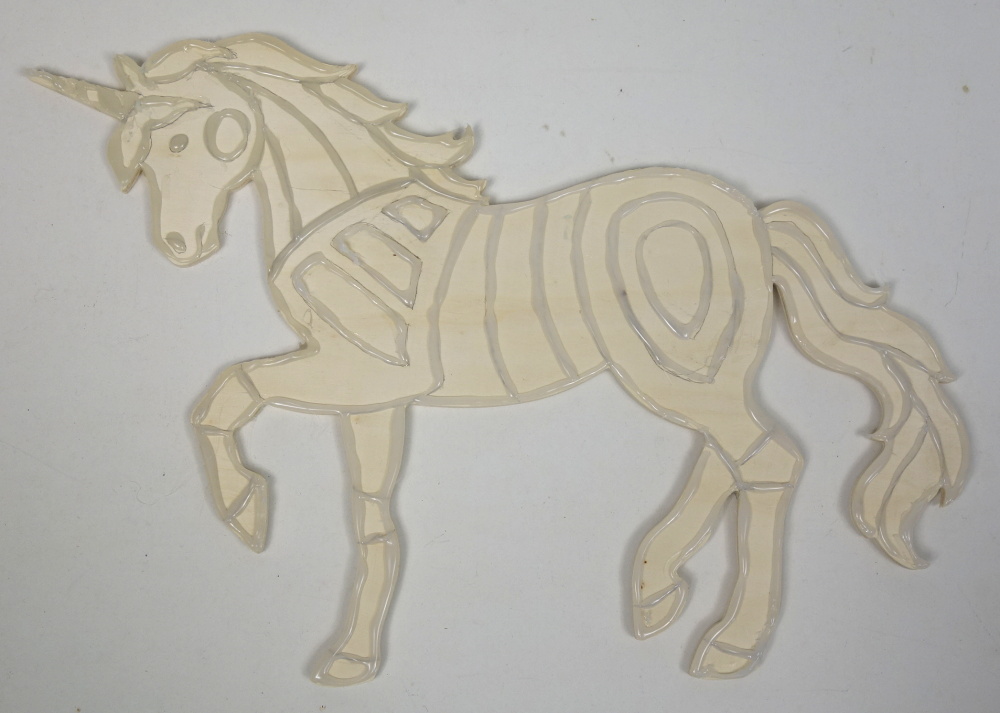
Before you turn off your glue gun, check each glue-enclosed section of your design to make sure its glue borders have no gaps and are of uniform height. Fix any imperfections at this point by applying additional glue and reshaping it, as necessary. There is no need to worry about pencil marks, minor imperfections, or splotches on the flat wood surface, as they will be covered with paint later. Here is the completed glue work.
The next step was to spray both sides of the unicorn with several light coats of glossy silver spray paint.
While waiting for this paint to dry sufficiently, I decided which paint colors would look best in each of the “wells” I had created with my glue-gun borders. I paid particular attention to which type (texture) of paint would go where. I penciled in the names of those paint colors (and types) on my paper design diagram for the project so I could use it as a guide during the painting process.
Next, I placed my unicorn on a level surface. (Making sure it is level is important!) I then used plastic pipettes to fill each well with well-stirred Pebeo Fantasy Prisme and Moon enamel paints. These fascinating paints form their best effects when applied thickly. The Prisme enamels have a circular-patterned effect (like flat bubbles), and the Moon enamels have a hammered-pattern effect. The two types also create uncontrollable and very interesting effects when allowed to run into each other. If you don’t have Pebeo Fantasy enamels, you could use acrylic or other suitable paints instead.
Check the completed piece every 10 minutes during the drying process to make sure paint has not overflowed or escaped its wells into other wells or off the edge of the project. Uncured paint may be scraped out of an adjacent well using a silicone stylus or other tool. Remaining paint may be pushed into the scraped-out area to cover it, if possible. Add more paint at this point, if necessary. If paint has risen up to obscure any of the glue ridges, excess paint may be scraped away gradually, during the drying process, until the paint is dry enough to remain where it is supposed to be. At that point, you can quit checking on it every 10 minutes and just let it dry for 2-3 days.
Although it is unnecessary, I recommend spraying the enameled side of the completely dried project with a semi-gloss UV protective coating. This will protect the enamels from gouges and/or fading from excessive sun exposure.
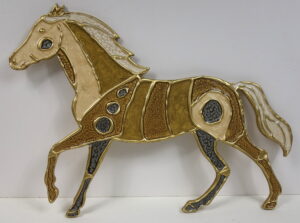
Here is the completed Cloisonne Unicorn.

I added a flat hanging bracket to its back side so it may either be hung or leaned against something when displayed.
I also created the Cloisonne Horse (shown below) using the same technique, but I used metallic gold spray paint on the glue lines, instead of silver.
I offered both for sale on my website.
The possibilities for using this hot-glue cloisonne painting technique are endless. Use your imagination, and send me pictures of your creations! Please leave your comments below along with any suggestions you may have for improving or elaborating on this technique.