
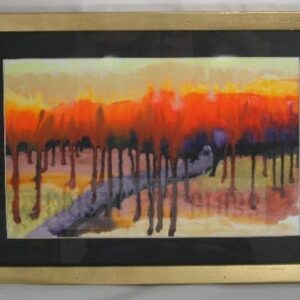


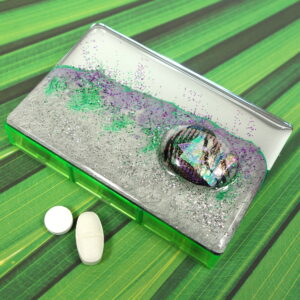
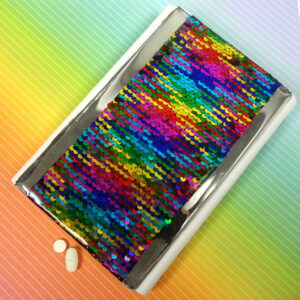


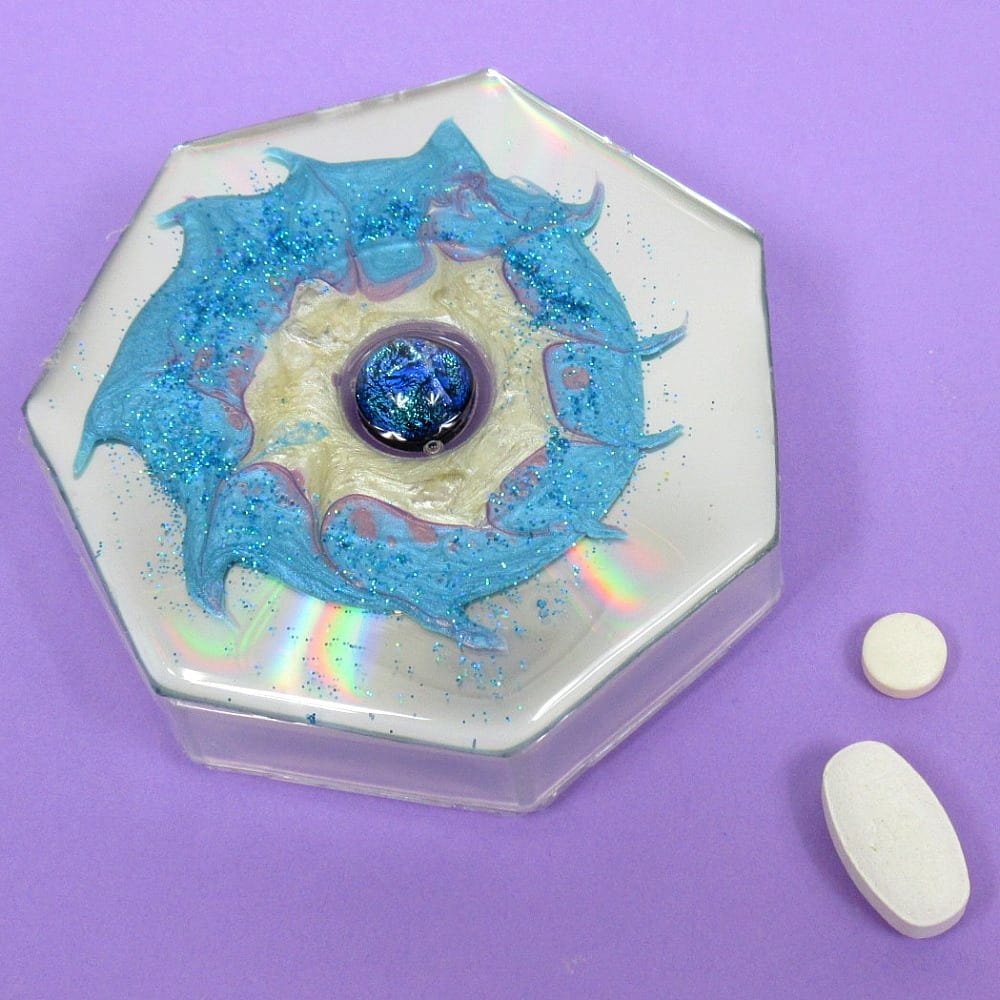
To use compact disks (CDs) or DVDs as tops on my “aurora” decorative pill organizers, as shown above, I had to experiment with various ways to cut the CDs to shape. Internet research suggested:
- Scoring them with an Exacto knife and then bending them to crack along the score line
- Cutting them with Dremel tools (recommended for intricate shapes)
- Cutting them with a belt saw using a special plastic-cutting saw blade
- Using a hot knife to cut them
- Heating them in boiling water or an oven or using a heat gun, and then cutting them with scissors
I tried using a jig saw, but the resultant cracking and crazing badly damaged the CD. It was too hard to use a Dremel tool to cut straight lines. Scoring the CDs didn’t work at all and greatly dulled my Exacto knife blades. I even tried smoothing the cut edges using my glass grinder, but that was an epic fail.
After considerable trial and error, I’ve decided that the best method of cutting CDs (for my purposes), is to heat portions of them with a heat gun and then cut them with a scissors. I’ll detail that process here.
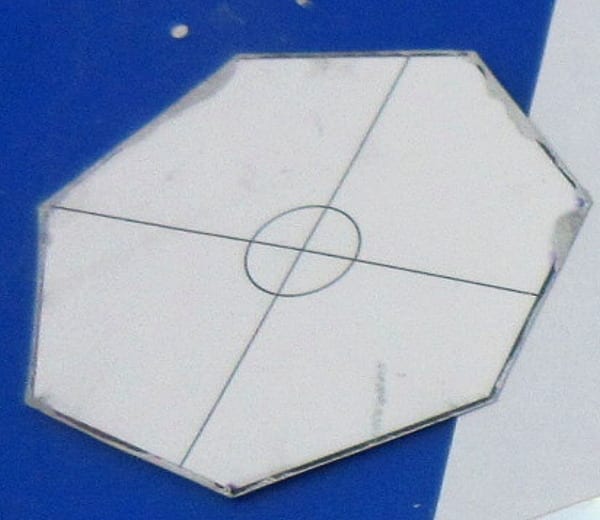
To begin, I created an appropriately sized 7-sided template on my computer and included on it a circle the same diameter as the center hole in a CD or DVD. I printed the template on white card stock and cut out the shape shown at left.
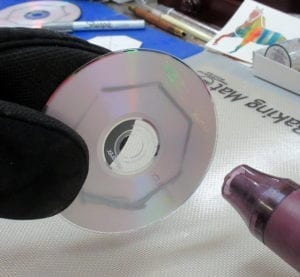
I then centered the template on the printed side of the CD by lining up the circle on the template with the hole of the CD. I then used a silver leafing marker to trace around the edge of the template onto the printed side of the CD. You could use a Sharpie marker if you don’t care what the printed side of the CD looks like for your project.
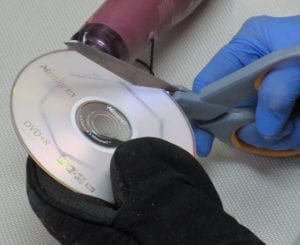
To keep my hands clean and heat safe, I donned nitrile gloves and a hot mitt on my left hand. My left hand got the most heat, but my right hand still needed a bit of protection from the heat, as I used it to rotate the disk held in my mitted hand.
I positioned my heat gun on its stand on a heat-safe silicone mat, pointing to my left. Then, holding the CD in my hot-mitted left hand, I waved in front of the heat gun the printed side of the area of the CD to be cut. Five to six seconds is a good time to start with. If you overheat the sidk, it can begin to delaminate, so caution is advised.
Using a titanium bladed scissors, I made my first cut, making sure to cut just inside of my marked line. (Any sharp scissors will probably work.) If the CD becomes hard to cut, stop cutting, reheat the area, and begin cutting again. When the CD is the right temperature, the scissors will easily cut it. If the CD is too cool when you are cutting it, the cut edge can become curled or dented, so take your time with this step, and be careful as you cut.
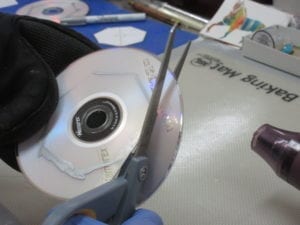
I then heated the next section, cut that piece off of the CD, and continued in that manner around the 7-sided shape.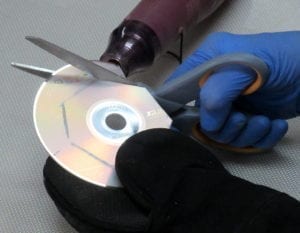
I was using Memorex DVDs in the pictures above, which have a silver printed side to better suit my purposes. My pillbox base boxes are transparent, so the printed side of a CD top will show through the bottoms of the pillbox compartments. Therefore, I needed to make sure the printed (and subsequently glued) side of the CD is devoid of distracting printed words or colors. To achieve that end, I used the silver leafing pen to color over any printing or colors on the printed sides of my trimmed CDs, as shown below.
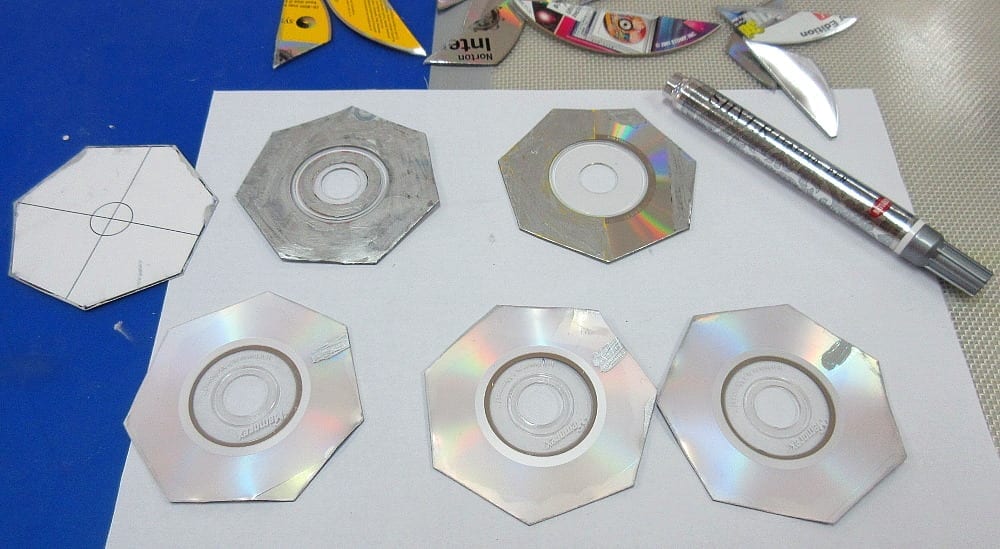
The Memorex DVDs did unexpectedly delaminate, which I discovered when I looked closely at the pieces I had cut off of the DVDs, as shown below.
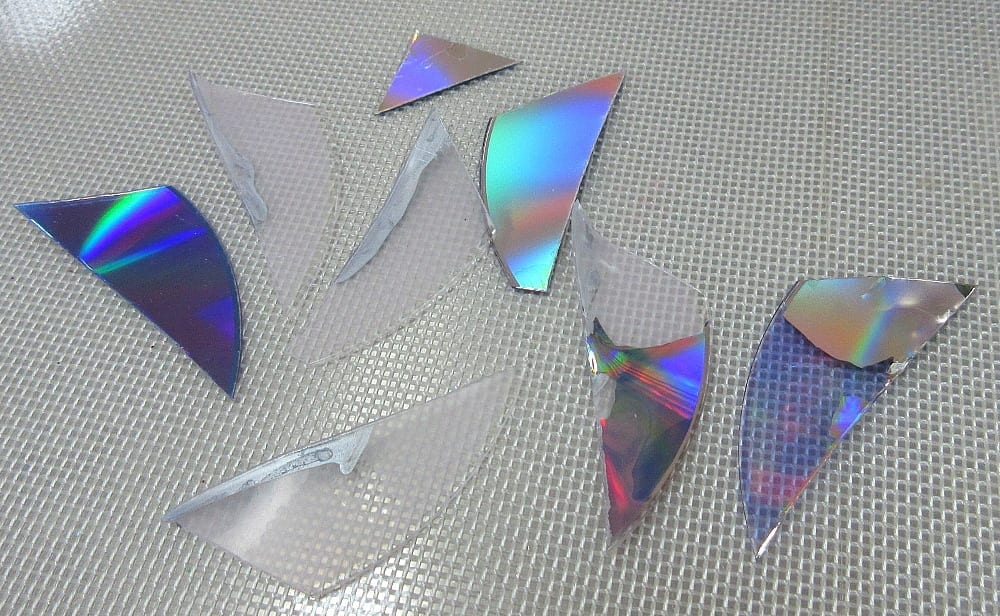
Sometimes the rainbow film stuck to one side, and other times it tore and stuck to both sides, as in the two pieces shown lower right in the above picture. Fortunately, the pieces I plan to use for my pillbox tops incorporate the center hole of the CD, which clamps the top and bottom plastic layers of the CD together well, so delamination hopefully will not be an issue. Some other brands of CDs/DVDs do not delaminate like this, especially those that have color printing on them, so experimentation will offer solutions to this potential problem.
You can see traces of my silver leafing pen markings on the clear plastic pieces above. The silver leafing pen marks remove easily with an alcohol swab.
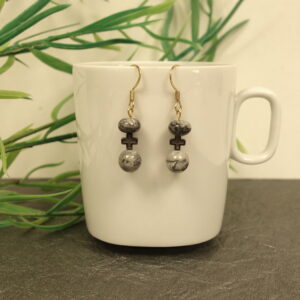
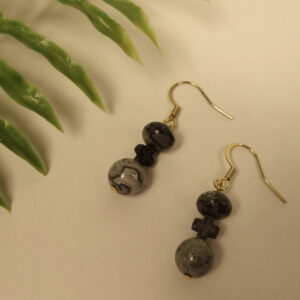
I made some of these cut-off pieces into lovely earrings by adding resin to both sides. I hope to incorporate some of these pieces into future creations, as well, as this process is quickly creating a surplus of cut-off pieces that are beautiful in their own right.
Cutting the CD to shape and covering any printing on the printed side with silver leafing ink are just the first two steps in creating an aurora pillbox like the one shown in the first picture of this blog post. I typically next add Pebeo Fantasy enamels as desired to parts of the rainbow side of the pillbox top and let them cure. I particularly need to do this to cover any manufacturer marks or wording near the center hole of the CD, if present. If possible, I like to retain the clear central portion of the CD so I can “float” cabochons on the top and bottom of the CD, back to back.
But before I can do that, I need to put clear shipping tape over the hole on the printed side of the CD, position a cabochon on the tape in the center hole, and pour a layer of jewelry quality resin (adding glitter or other occlusions to the resin, as desired) over the full surface of the rainbow side of the CD. This protects the enamel and rainbow layers and also firmly seats the cabochon in the hole. After the resin has cured, I’ll remove the tape and glue a cabochon to the underside of the cabochon that already in the center hole. I’ll then glue the printed side of the CD to the plastic pillbox base box and let the glue cure. Then I’ll turn the pillbox over and pour resin into the central well, surrounding the base of the second cabochon to firmly seat it.
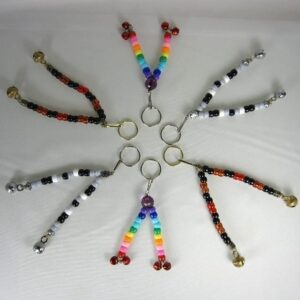
Given all these steps, my aurora pillboxes are priced a bit higher than my other small septagon pillboxes. However, I think you’ll agree that their sublime dazzle is worth the extra effort it takes to make them. If any currently are available, you can check them out on my website.
The five new aurora small septagon pillboxe tops shown in this tutorial are currently in production, and I expect the completed pillboxes to be available in a few weeks, along with several other new pillbox creations. To be notified of my future pillbox creations, sign up for my new product emails and indicate your interest in my pillboxes.